Friday, December 7, 2012

Galetes decorades de Nadal / Decorated Christmas cookies

Per mi, aquesta és l'època de l'any en que més galetes decorades faig. A part de ser delicioses i quedar moníssimes, el millor és la il·lusió amb que es fan aquestes galetes, ja que moltes seran regals per a persones molt estimades meves, i altres serviran per decorar de Nadal la casa.

This is the time of the year that I make and decorate many, many cookies. A part from being delicious and super cute, the best is that they are made with lots of love because many of them will be given as presents to my loved ones, and some others will be Christmas decorations for home. 

Aquí us deixo les fotos de les galetes nadalenques que he fet aquest any. Per a la recepta de les galetes de mantega podeu anar aquí 

Here some pictures of the decorated Christmas cookies I've done this year. For the recipe of the butter cookies, go here


Bon Nadal!!!!
Merry Christmas!!!!

Monday, July 30, 2012

Galetes de Xocolata / Chocolate Chip Cookies


M'encanta aquesta època de l'any. L'estiu per a mi significa gaudir dels nens a la piscina, o anant en bicicleta, o jugant a cartes o escacs, o anant d'excursió... Significa poder fer més trobades amb els amics i la família tot fent una cerveseta a fora el pati, o menjant galetes i pastissets. Significa allargar el dia i la nit. Significa estar relaxat i fer les coses amb més calma. I també significa l'emoció de plantejar i organitzar les vacances: primer pensar on anar, i després viure amb il·lusió tots els preparatius del viatge i de les vacances.

I love this time of the year. For me, summer means enjoying the kids at the swimming pool, or riding a bike, or playing cards or chess, or going trekking... It means more getting-togethers with friends and family while having a cold beer or some cookies and cupcakes. It means longer days and nights. It means relax and doing things with more time. And it also means the emotion of planning and organizing the summer holidays: first, thinking where to go and then preparing everything for the trip and the holidays.   

Aquestes galetes de xocolata que us presento són ideals per compartir en aquestes trobades estivals, o per berenar acompanyades d'un got de llet ben freda, o per picar en qualsevol moment!!! Són cruixents per fora i tendres per dins, i súper gustoses degut a la quantitat obscena de mantega, sal i xocolata que porten.


These chocolate chip cookies are perfect to share in these summer gatherings, or as a snack with some cold milk, or to eat at any time!!! They are crunchy outside but tender inside and super tasty. Their trick is the obscene amount of butter, salt and chocolate in the recipe. 


La clau d'aquestes galetes és refredar la massa fins que sigui dura, o fins i tot congelar-la abans de fornejar. D'aquesta manera s'aconsegueix una consistència perfecta.


The key to these cookies is chilling the dough until it’s hard or frozen before baking. This way we get the perfect consistency.


Ingredients:

175 g mantega sense sal, a temperatura ambient
1/2 cullereta (teaspoon) de sal
40 g sucre blanc
240 g sucre morè
1 ou
1 clara d'ou
1 1/2 culleretes (teaspoons) d'extracte de vainilla
240 g farina blanca
1/4 cullereta (teaspoon) bicarbonat
25 ml llet
250 g xocolata negra de qualitat, tallada a trossets de la mida d'un pèsol


Ingredients:

175 g unsalted butter, at room temperature
1/2 teaspoon salt
40 g white sugar
240 g brown sugar
1 egg
1 egg white
1 1/2 teaspoons vanilla extract
240 g plain flour
1/4 teaspoon baking soda
25 ml milk
250 g high-quality dark chocolate, chopped into pea-size pieces. 


Batre la mantega, la sal i els dos tipus de sucre amb l'ajut d'un batedor elèctric, fins obtenir una crema blanca i més voluminosa.
Batre l'ou i la clara d'ou junts en un bol, i afegir lentament a la crema de mantega. Batre fins obtenir una mescla homogènia. Afegir l'extracte de vainilla i barrejar. 
Tamisar la farina i el bicarbonat conjuntament. Afegir la meitat de la mescla de farina a la mescla de mantega i batre fins que la barreja sigui homogènia. Afegir la llet i batre bé. Afegir el que queda de farina i batre fins que quedi tot ben combinat. 
Afegir els trossos de xocolata i barrejar bé.
Preesclalfar el forn a 180ºC
Utilitzant dues culleres, o una cullera per a gelat petita, fer boles amb la massa (d'uns 20 g cadascuna) i col·locar a la safata del forn que haurem cobert amb paper vegetal. Les boles han d'anar separades les unes de les altres perquè al forn s'estendran i aplanaran. 
Refrigerar durant 20-25 minuts (en aquest punt, les boles de massa de galeta també es poden posar al congelador durant dues hores i llavors col·locar-les en un tupper hermètic i guardar-les congelades per fornejar un altre dia. Descongelar durant uns 15 minuts abans de fornejar)
Un cop la massa és ben freda i dura, fornejar durant 9-13 minuts. Les galetes están ben cuites quan la superfície està seca i ja no brilla. Veureu que dins el forn es van aplanant però queden inflades. No passa res, al treure-les es desinflen i queden planetes i maques. 
Treure del forn i deixar refredar a la safata durant 5 minuts abans de transferir-les a una reixeta per a que es refredin del tot. Veureu que les galetes estan força toves mentre són calentes. No us preocupeu, s'enduriran al refredar-se i estaran perfectes.


Beat the butter, salt and both sugars with the help of an electric mixer until the mixture is lightened in color and increases in volume.
Beat the egg and egg white together in another bowl. Slowly add to the butter mixture and beat until thoroughly combined. Add the vanilla extract and mix.
Sift together the flour and baking soda. Add half of the flour mixture to the butter mixture and beat until just combined. Add the milk and beat until just combined. Add the remaining flour mixture and beat until just combined.
Add the chopped chocolate to the dough and mix until thoroughly combined.
Preheat the oven to 180ºC
Using two spoons or a small ice-cream scoop, place dollops of dough (about 20g) onto the prepared baking sheets, spaced well apart (the dough will flatten and spread while baking). Refrigerate for 20-25 minutes until the dough hardens. (At this point, you can also pop them in the freezer, freeze for two hours, then place the dough balls in a freezer bag and keep in the freezer for baking at a later day. Defrost for 15 minutes before baking)
When the dough is hard and chilled, bake for 9-13 minutes. The cookies are done when the tops are dry and don’t look shiny any more. You'll see they spread in the oven but are not flat. It's ok, they will flatten and get nice when you take them out of the oven. 
Remove from the oven and let cool on the baking sheet for 5 minutes before transferring the cooking to a wire rack.
They are quite soft when they are still hot, but don’t worry, they will harden when cool.    


Bon estiu i bona fornada
Happy summer and happy baking

Font: Tea with Bea
Source: Tea with Bea


Thursday, July 12, 2012

Festa Pirata / Pirate Party


Que un pirata faci 6 anys no passa tots els dies, així que quan va arribar l'aniversari del Capità Biel vem convidar tots els seus grumets. Va ser una festa pirata molt divertida, amb jocs d'aigua (és clar, quan hi ha tempesta dalt del vaixell pirata, et mulles), jocs d'equips i de pirates, i finalment vem trobar el tresor amagat i ens el vem menjar (ups! és que eren llaminadures!!!)

That a pirate turns 6 doesn't happen every day, so when Captain Biel's birthday arrived we invited all his fellow sailors over. It was a very cool pirate party, with water games (of course, when there is a storm onboard a pirate ship, sailors get very wet), team and pirate games, and finally we found the hidden treasure and we ate it up (ups! this is because it was all candy!!!)


Bé, per agafar forces vem haver de berenar de valent, així que vem tenir cupcakes pirata, entrepans, quiche, i fruita fresca.

To get some energy we needed a big snack, so we had pirate cupcakes, sandwiches, quiche and fresh fruit.


Els cupcakes pirata eren de vainilla amb ganache de xocolata, senzills però boníssims. Els toppers els vaig tunnejar amb el nom del Capità a partir d'uns imprimibles que vaig trobar a pequeocio.com i que vaig imprimir en fulls d'enganxina. Un cop retallades les enganxines no només les vaig fer servir en els toppers dels cupcakes, sinó també per personalitzar els gots i les bosses de la festa. Va quedar genial.

The pirate cupcakes were vanilla cupcakes with chocolate ganache frosting, simple but delicious. The toppers were edited with the name of the Captain from the printables I found at pequeocio.com and that I printed on sticker paper. Once the stickers were cut out I used them to make the toppers and also to personalize the party glasses and bags. They came out great.


El pastís pirata el vaig fer amb tres capes de pa de pessic, merenga suïssa de nabius com a farcit i cobertura,  i llavors cobert i decorat amb fondant. La inspiració per al pastís pirata va ser d'internet també, si escriviu "pirate cake" a imatges de google, us apareixeran milers de pastissos fantàstics.

The pirate cake was made with three layers of sponge cake filled and covered with blueberry Swiss buttercream and then all covered and decorated with fondant. The inspiration for the pirate cake came out from internet too, if you write "pirate cake" in google images, you'll come out with thousands of pictures of fantastic cakes.


Les galetes pirata, que per cert, vaig oblidar de treure el dia de la festa, amb la feina que em van donar i tan boniques que van quedar!!! són galetes de mantega decorades amb glassa reial basant-me amb les galetes pirata de la genial sweet sugar belle. Haurien funcionat com a regal per als grumets convidats si hagués recordat de donar-les!!! Bé, a l'endemà el Capità i la sots-capitana se les van endur al Casal d'estiu com a esmorzar i van trionfar :)

The pirate cookies, which I forgot to take out on the day of the party by the way, with all the work I had to make them this pretty!!!, were butter cookies decorated with royal icing and inspired on the cookies by the great sweet sugar belle. They would have worked as a gift for the sailors invited to the party, if I had remembered to give them out!!! Well, the following day Captain and viceCaptain took them to Summer Camp for breakfast and were a great success :)


Tuesday, May 8, 2012

Cupcakes de xocolata definitius / The ultimate devil's food cake


Sí, sí, els cupcakes de xocolata que vaig publicar anteriorment són mooolt bons, però aquests són una passada!!! Tot un capritx per als xocoaddictes, proveu la recepta i no us en penedireu.
Els vaig fer com a cupcakes, amb ganache de xocolata per sobre, i com que em va sobrar massa, la vaig aprofitar per fer un pastís. Va ser tot un èxit. No he tingut massa temps últimament per a publicar res, però és que aquesta recepta és tan bona que no podia viure sense publicar-la!!

Yes, yes, the previous chocolate cupcakes I posted were veeery good, but these ones are something else!!! Real indulgence for chocoaddicts. Try the recipe and you won't ever regret it.
I used the batter to make cupcakes, with chocolate ganache to frost them, and since I had some batter left, I used it to bake a cake. It was a real success. I haven't had much time lately to post anything, but this recipe is just so great that I just couldn't live without posting it!!

Per a aquesta recepta es fa servir xocolata natural en pols. La xocolata natural conté l'acidesa necessària per a reaccionar amb el bicarbonat, fent així que els cupcakes quedin mooolt esponjosos. L'oli vegetal també ajuda a mantenir-los esponjosos, mentre que la mantega els dóna profunditat. Tots aquests ingredients fan una massa de cupcake o de pastís meravellosa - súper esponjosa i fins i tot millor el dia següent.

For this recipe natural cocoa powder is used, and not Dutch-process cocoa powder. Natural cocoa powder provides the acidity necessary to react with the baking soda, making veeery moist cupcakes. The vegetable oil also helps to keep them moist, while the butter gives depth to the taste. This makes the most wonderful cupcake or cake batter - super moist and even better the next day.


Ingredients (per a 12 cupcakes o 1 pastís per a 4-6 persones)

60 g xocolata natural en pols
125 ml aigua bullent
65 ml llet
1 teaspoon (cullereta) extracte de vainilla
65 g mantega a temperatura ambient
140 g sucre morè
80 g sucre blanc mòlt
65 ml  oli vegetal
2 ous
140 g farina
1 teaspoon (cullereta) bicarbonat

Pre-escalfar el forn a 170 ºC
Posar la xocolata en pols en un bol. Afegir-hi l'aigua bullent i remenar bé. Afegir-hi la llet i l'extracte de vainilla i tornar a remenar bé. Reservar.
Batre la mantega i els dos tipus de sucre amb l'ajut d'un batedor elèctric, fins que la barreja sigui clara de color i suau i esponjosa de textura. Abocar-hi l'oli vegetal lentament en un rajolí constant i barrejar fins que estigui ben combinat. Afegir els ous d'un en un, batent fins que el primer estigui completament incorporat abans d'afegir-hi el segon.
En un altre bol, barrejar la farina i el bicarbonat, i tamisar dues vegades.
Afegir una tercera part de la barreja de farina a la barreja de mantega, sucre i ou i barrejar fins que estigui ben incorporat.
Afegir la meitat de la barreja de xocolata i barrejar fins que estigui ben combinat. Repetir amb un altre terç de la barreja de farina, llavors amb la resta de la barreja de xocolata, i finalment afegir el que queda de farina i barrejar fins que estigui tot ben incorporat.
Distribuir la barreja a les càpsules de cupcake, o abocar al motllo de pastís que haurem engreixat prèviament.
Fornejar els cupcakes durant 18-20 minuts, o durant 35-45 minuts si es tracta del pastís. La prova que està fet és punxant un escuradents al mig i que aquest surti net.
Deixar refredar completament abans de posar-hi la ganache de xocolata per sobre, o el frosting que preferiu :)


Ingredients (for 12 cupcakes or 1 cake serving 4-6)

60 g (1/2 cup) natural cocoa powder
125 ml (1/2 cup) boiling water
65 ml  (1/4 cup) milk
1 teaspoon vanilla extract
65 g (1/2 stick) unsalted butter, at room temperature
140 g (2/3 cup) dark brown soft sugar
80 g (3/8 cup) caster sugar
65 ml  (1/4 cup) vegetable oil
2 eggs
140 g (1 cup) flour
1/2  teaspoon baking soda

Preheat the oven to 170ºC (340ºF)
Put the cocoa powder in a bowl. Add the boiling water and mix well. Stir in the milk and vanilla extract and set aside.
Using an electric mixer (or electric whisk), beat the butter and both sugars until the mixture is light in color and fluffy in texture. Slowly pour in the oil in a steady stream and mix until combined. Add the eggs, one at a time, beating until thoroughly combined before adding the next.
In another bowl, combine the flour and baking soda and sift twice. Add one third of the flour mixture to the egg mixture and mix until well incorporated. Add half the cocoa/milk mixture and mix until just combined. Repeat with another third of the flour mixture, then the rest of the cocoa/milk mixture. Finally, add the last third of the flour mixture and mix until thoroughly combined.
Spoon the mixture into the cupcake capsules or the prepared cake pan.
Bake for 18-20 minutes for the cupcakes, and 35-45 minutes for a cake. A toothpick inserted in the middle should come out clean.
Let cool completely before frosting the cupcakes or the cake with chocolate ganache or the frosting of your choice :)


Font: Tea with Bea (Bea's of Bloomsbury)
Source: Tea with Bea (Bea's of Bloomsbury)


Thursday, February 23, 2012

Traditional Brownies!!!!


Doncs aquí els teniu, amb molta xocolata i ben densos. Es poden fer amb o sense nous, però a mi m'agrada trobar-me els trossets durs i una mica salats d'aquest fruit sec en el meu brownie. Si us agrada amb moooolta més xocolata, podeu afegir pepites de xocolata a la massa abans de coure'ls!!!

Here they are, very chocolatey and dense. You can bake them with or without walnuts, but I like to find the hard and salty bits of this nut inside my brownie. For chocolate overload, you can put chocolate chips in the mixture before baking!!!

Ingredients:

200 g xocolata negra tallada a trossos
175 g mantega sense sal
325 g sucre mòlt
130 g farina
3 ous
150 g nous tallades a trossets
sucre glass per decorar

Preescalfar el forn a 170ºC
Posar la xocolata i la mantega en un bol i desfer al bany maria. També es pot desfer al microones, però a baixa temperatura i de 40 segons en 40 segons o menys, i remenant a cada vegada per a que no es cremi la xocolata.
Un cop la xocolata i la mantega s'han fos, retirar del bany maria o del microones i afegir-hi el sucre. Remeneu-ho bé fins que estigui ben incorporat. Afegir la farina i remeneu bé una altra vegada fins que estigui ben incorporat. Afegir els ous i barregeu fins obtenir una massa espessa i llisa. Finalment, afegir els trossos de nous i  barrejar.
Distribuir la massa en una safata rectangular de 30x20 cm aproximadament folrada amb paper del forn, o engreixada amb oli o mantega (per a que no s'enganxi el brownie). Fornejar durant 30-35 minuts, o fins que la part de dalt faci com una mena de crosta, però estigui tou per dins. Vigileu de no coure-ho massa, sinó els cantons us quedaran durs i cruixents.
Deixar refredar completament abans d'espolsar-hi el sucre glass per sobre i servir.


Ingredients:

200 g dark chocolate, roughly chopped
175 g unsalted butter
325 g caster sugar
130 g plain flour
3 eggs
150 g chopped walnuts
confectioner's sugar to decorate

Preheat the oven to 170ºC (325ºF)
Put the chocolate and butter in a heatproof bowl over a saucepan of simmering water and let everything melt together.
Remove from the heat. Add the sugar and stir until well incorporated. Add the flour and stir until well incorporated. Stir in the eggs and mix until thick and smooth. Finally, add the chopped walnuts and stir.
Spoon the mixture into a baking tray of approx 30x20 cm lined with greaseproof paper or greased with oil or butter. Bake for about 30-35 minutes, or until flaky on the top but still soft in the centre. Be careful not to overcook otherwise the edges will become hard and crunchy. Leave to cool completely before dusting with confectioner's sugar, to decorate.


Font: The Hummingbird Bakery Cookbook
Source: The Hummingbird Bakery Cookbook

Monday, February 13, 2012

Galetes Decorades / Decorated Cookies


No és que celebrem San Valentí a casa, per al dia del enamorats tenim el nostre San Jordi, que de fet per a nosaltres es converteix més en el dia del llibre que el dia dels enamorats. De fet, no penseu que és una mica absurd tenir un dia dels enamorats? Quan un està enamorat, cada dia és especial!!!  

It's not that we celebrate Saint Valentine's Day at home or anything, as the "love day" we've got our Saint George on 23rd of April, which is more a book and culture day for us than a love day (nonetheless, Shakespeare and Cervantes both died on a 23rd April). And besides, don't you think it's a bit absurd to have a love day? When one is in love, everyday is especial!!!


A mí m'agraden els cors sigui o no sigui San Valentí, així que vaig disfrutar molt decorant aquestes galetes. Vaig fer servir unes plantilles i texturitzadors que podreu trobar a todotartas.es

I like hearts whether it's Saint Valentine or not, so I really enjoyed decorating these cookies. I used stencils and texturizers from todotartas.es


 Aquest cor platejat i daurat el va fer la meva filla i he de reconèixer que se li comença a donar prou bé per tenir només vuit anys, cosa que m'agrada molt perquè així puc compartir aquesta bojeria meva amb ella. Avui ve i em diu: "mama, decorem unes galetes o fem un pastís o alguna cosa?"

My daughter made this silver and golden heart, and I have to recognize that she's starting to get good at it considering she's only eight. This is something I like very much because I can share this craziness of mine with her. Today she comes to me and says: "mom, can we decorate some cookies, or bake a cake or something?"


Recordeu els ocellets que vaig publicar fa uns dies? Doncs els he fet una caseta per a que puguin fer el seu niu. A la caseta li falten alguns detalls encara, us els ensenyaré aviat. :)

Remember the little birds I posted some days ago? Well, I've made them a house so that they can have their nest in it. I still have to add some details on the house which I'll show you very soon. :)


I aquesta és de les preferides que he fet fins ara. Sencilla però bonica. El botó està dedicat a tots aquells que creen obres d'art amb l'agulla, hi ha gent que fa autèntiques meravelles amb un tros de roba, fil i un botó. 

And this one I like the most out of what I've done so far. Simple but pretty. The button is dedicated to all of those who create pieces of art with a needle. Some people can really create wonderful things just with a piece of cloth, thread and a button.


Encara us podeu apuntar al curs que faré el dia 25 de Febrer. Farem aquestes galetes i algunes altres més, i ens ho passarem molt bé. Més informació a silnik022@yahoo.com i aquí

The course on the 25th February is still open. We'll make these cookies and some more, and we'll have lots of fun. More information at silnik022@yahoo.com and here

Friday, February 10, 2012

Els primers Red Velvet Cupcakes / My first Red Velvet Cupcakes


D'acord, d'acord.... en veure la foto la majoria deveu estar pensant que no hi ha "red" per enlloc en aquests cupcakes!! Si, és veritat. Pretenien ser uns Red Velvet Cupcakes (de vellut vermell), però hi vaig posar poc colorant vermell, així que van quedar Velvet, però no Red.
Ja sabeu, si els proveu de fer a casa (cosa que us recomano perquè queden boníssims), poseu-hi força colorant vermell si no voleu que us passi com a mi.

Ok, ok.... most of you must be thinking that there's no red at all in these cupcakes!! Yes, it's true. They pretended to be Red Velvet Cupcakes, but I used too little red food color, so they came out Velvety but not Red.
So, if you try to make them at home (which I recommend you to do because they are delicious), use a lot of red food color if you don't want the same to happen to you.

El Red Velvet, de fet, és un cupcake de xocolata molt suau, que té com a característica que és vermell. Si no hi poséssim colorant, quedaria de color de xocolata, igualment atractiu, però no seria un Red Velvet. Em van explicar que abans el feien fent servir remolatxa per a tenyir la massa, però no vull ni imaginar el sabor que devia tenir.... Si algú ho prova i li queda bé, que m'ho digui, si us plau!!

Red Velvet cupcakes are very moist and tender chocolate cupcakes (this is why they are called Velvet). The special thing about them is that they are red. If we didn't use food color, they would come out in a nice chocolate color, equally nice, but it wouldn't be a Red Velvet. I was told once that they used to make them using beetroot to color the batter, but I don't even want to imagine how they would taste... If anyone has ever tried it, let me know!!


Ingredients (per a 12 cupcakes):

60 g mantega sense sal, a temperatura ambient
150 g sucre mòlt
1 ou
10 g cacau en pols
colorant alimentari vermell
1/2 teaspoon extracte de vainilla
120 ml buttermilk
150 g farina
1/2 teaspoon sal
1/2 teaspoon bicarbonat
1 teaspoon vinagre de vi blanc
Per a decorar: Frosting de Formatge en crema 

Prescalfar el forn a 170ºC
Batre la mantega i el sucre amb l'ajut d'un batedor elèctric fins obtenir una barreja ben cremosa i blanca. Afegir-hi l'ou i seguir batent fins que aquest quedi ben incorporat.
En un altre bol, barrejar el cacau en pols, el colorant alimentari vermell i l'extracte de vainilla, obtenint així una pasta espesa i fosca.
Afegir aquesta pasta a la barreja de mantega i batre bé fins que quedi tot ben incorporat i de color vermell.

Ingredients (for 12 cupcakes):

60 g unsalted butter, at room temperature
150 g caster sugar
1 egg
10 g cocoa powder
red food color
1/2 teaspoon vanilla extract
120 ml buttermilk
150 g flour
1/2 teaspoon salt
1/2 teaspoon baking soda
1 1/2 teaspoons white wine vinegar
Decoration : Cream Cheese Frosting 

Preheat the oven to 170ºC (325ºF)
Beat the butter and sugar with the help of an electric mixer until light and fluffy and well mixed. Add the egg and keep beating until everything is well incorporated.
In a separate bowl, mix together the cocoa powder, red food color and vanilla extract to make a thick, dark paste.
Add to the butter mixture and mix thoroughly until evenly combined and colored.


Jo vaig pensar que ja em quedava un to vermellós, com el que veieu a la foto, però us ha de quedar més vermell que això.
Afegir el buttermilk i la farina, començant per la meitat del buttermilk fins que estigui incorporat, la meitat de la farina, fins que estigui incorporada, i repetint aquest procés fins haver afegit tot el buttermilk i la farina. Batre a altra velocitat durant uns pocs minuts fins obtenir una barreja homogènia i llisa.
Afegir la sal, el bicarbonat i el vinagre de vi blanc i batre un altre cop a velocitat alta durant un parell més de minuts.

I though this was red enough, as you can see in the picture, but it needs to be redder than this.
Add half the buttermilk and beat until well mixed, then add half the flour and beat until well incorporated. Repeat this process until all the buttermilk and flour has been added. Turn the mixer up to high speed and beat until you have a smooth, even mixture. Add the salt, baking soda and bicarbonate and beat until well mixed, then turn up the speed again and beat for a couple more minutes.


Distribuir la massa a les càpsules de cupcake.
Si voleu que tots us quedin de la mateixa mida podeu fer servir una cullera de servir gelat com a mesura. A més, la pala que té per tirar avall el gelat també us ajudarà a tirar avall la massa, jejeje

Spoon the batter into the cupcake capsules.
If you want your cupcakes all the same size, an ice cream spoon is a good tool to measure the amount of batter you are putting into the capsules, ahahah


Un cop tota la massa està distribuïda, fins a dos terços de les càpsules aproximadament, fornejar durant uns 20 minuts, o fins que al punxar un escuradents al mig aquest surti net.
Jo pensava que els cupcakes quedarien del mateix color que la massa...

Once all the batter is distributed, until two-thirds full approximately, bake for about 20 minutes, or until a toothpick inserted in the middle comes out clean.
I though the cupcakes would come out the same color as the batter...


Però voilà, en sortir del forn van quedar d'aquest altre color :(

But voilà, this is the color they had once they came out of the oven :(


El frosting és de Crema de Formatge i està decorat amb un les engrunes d'un cupcake esmicolat, a la manera com ho fan a la Hummingbird Bakery, tot i que a mi em van quedar força grosses.

The frosting is Cream Cheese and it's decorated with the crumbs of a crushed cupcake, as they do in the Hummingbird Bakery, although the crumbs came out quite big.


Font: The Hummingbird Bakery Cookbook
Source: The Hummingbird Bakery Cookbook

Tuesday, January 24, 2012

Ocellets i Curs / Little Birds and Course


Un ocellet m'ha dit que s'ha obert un curs de galetes i decoració!!!
A little bird has told me that there is a cookie decoration course!!!


Data: Dissabte 25 de febrer  
Date: Saturday 25th February

Hora: de 10 a 14h (amb esmorzar al mig)  
Time: from 10 to 14h (with breakfast in the middle)

Lloc: Obrador / casa de Cupcakes by Silvia (Castellar del Vallès)   
Place: kitchen / home of Cupcakes by Silvia (Castellar del Vallès)

Alumnes: màxim 6 persones  
Students: 6 people maximum

Preu: 40 euros  
Price: 40 euros


Què farem: aprendrem a fer galetes de mantega amb formes bàsiques i aprendrem a decorar-les amb glassa i amb fondant. 
What we will do: learn how to make butter cookies in basic shapes and learn how to decorate with royal icing and with fondant.

Cada alumne s'endurà a casa les seves creacions
Each student will take their creations home

Inscripció: silnik022@yahoo.com  
Application: silnik022@yahoo.com


Sunday, January 15, 2012

Cupcakes a Barcelona / Cupcakes in Barcelona

Què penseu, que només es poden menjar cupcakes a Londres??? NO!!!! A Barcelona també!!!!
Avui us explicaré un parell de llocs molt monos que vaig descobrir al barri del Born. Si hi aneu, segur que també us agradaran tant com a mi.


What do you think, good cupcakes only in London??? NO!!!! In Barcelona too!!!!
Today I will tell you about a couple of cute places that I discovered in the district of the Born. If you happen to go there, I’m sure you’ll like them as much as I did. 


Primer de tot la "Lolita Bakery" on trobareu força varietat de cupcakes, pastissos i galetes. Són de gustos i d'estètica una mica tradicionals, però també hi trobareu propostes originals. El local és d'estil vintage, amb peces antigues i mobiliari amb caràcter nòrdic, molt acollidor i càlid, però amb poc lloc per a seure i gaudir del que surt del seu forn. Com que no havíem berenat quan hi vem arribar, i érem una bona colla, vem triar una selecció de cupcakes i pastissos ben variada i vem sortir a fora a degustar-los. Gairebé tot ho vem trobar molt bo, menys un tros de pastís que estava poc cuit i feia gust de farina crua. Per sort, tot el demès estava deliciós i va compensar el tros que no va sortir bé.


First of all “Lolita Bakery”, where you will find a good variety of cupcakes, cakes and cookies. They are traditional in taste and image, although you’ll also find some more original offers. The place has a vintage look, with old pieces and Nordic-kind furniture. It’s very homely and warm, but with little place to sit and enjoy what they bake. We hadn’t eaten before we got there, and because we were quite a lot of people, we chose a good selection of cupcakes and cakes and took them away. We found almost everything very delicious, except a piece of cake that was under baked and tasted like raw flour. Luckily, everything else was delicious and made up for the bad piece.


Aquesta pissarra amb les instruccions per a fer un cupcake és d'allò més original i artístic. Em va encantar.


This blackboard with the instructions to bake a cupcake is so original and artistic. I loved it.


També venen càpsules per a cupcakes, caixes i complements per als vostres dolços. Tot molt mono.


They also have cupcake capsules, boxes and complements for your sweet treats. Very cute.


Aquí alguna mostra de les seves galetes, a dalt, i dels cupcakes, a baix. Si esteu mirant això abans de dinar o de sopar, de ben segur que se us deu haver obert la gana!! 


Here some of their cookies, above, and cupcakes, below. If you are watching this before having lunch or dinner, sure it will have given you an appetite. 


La seva adreça: 
http://www.lolitabakery.com/


Portal Nou 20
El Born, Barcelona


També els trobareu a Provenca 267, Eixample, Barcelona


Their address: 
http://www.lolitabakery.com/


Portal Nou 20
El Born, Barcelona


You'll also find them in Provenca 267, Eixample, Barcelona


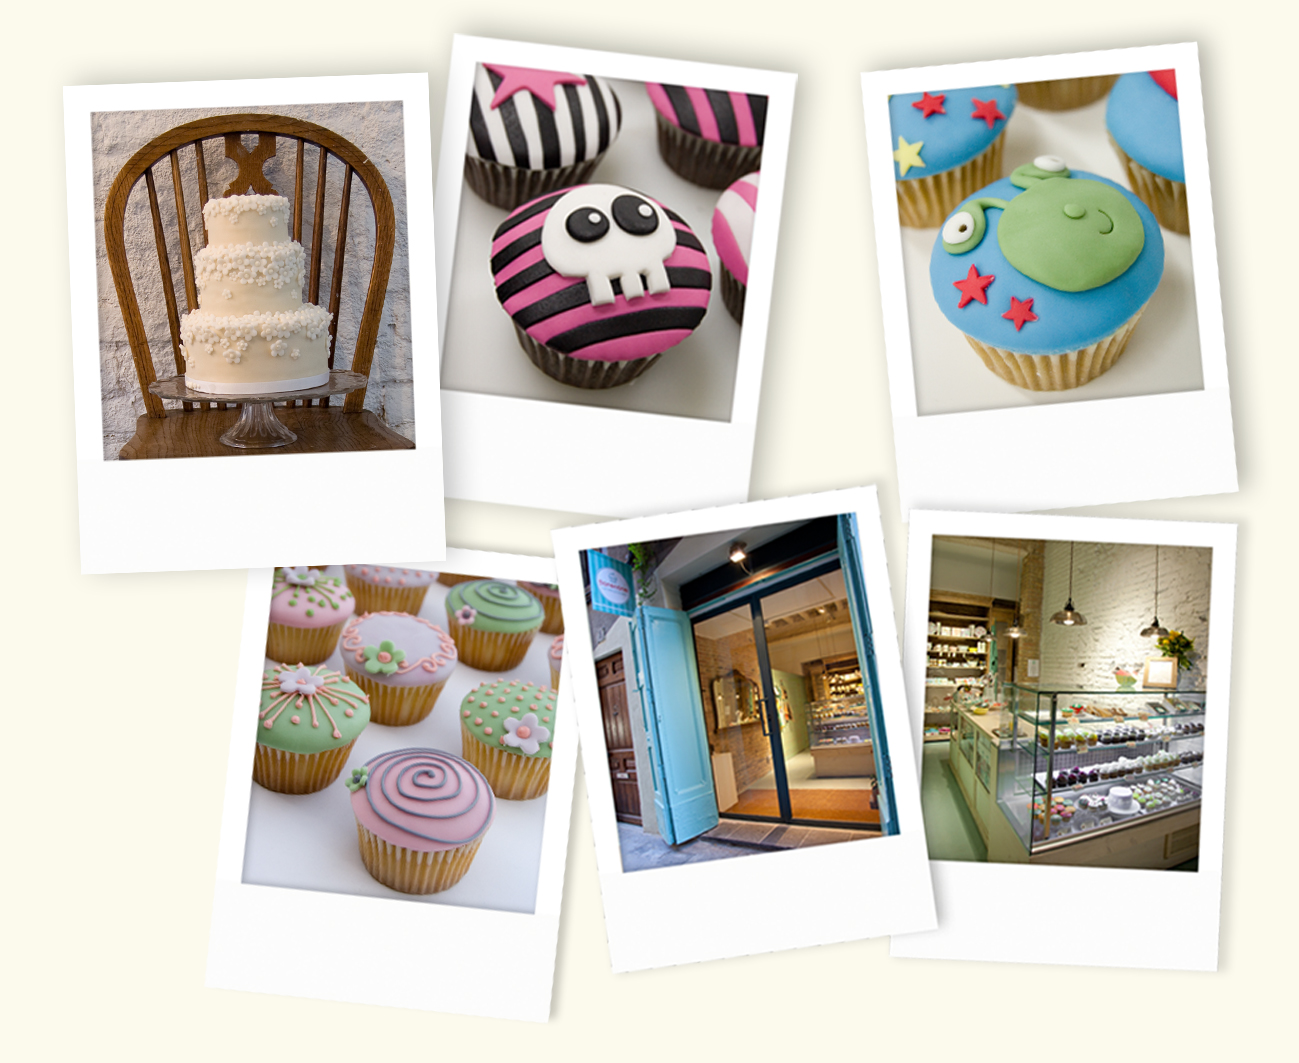
L'altre lloc que us vull ensenyar també es troba al Born. Es tracta de "Florentine Cupcakes". Quan hi vem arribar ja eren a punt de tancar i no vaig poder comprar res ni fer-hi fotos. Tot i així, ens van deixar entrar-hi i tot i que ja recollien, allí dins es respirava glamour i "savoir-faire", dins d'un estil molt chic. Sens dubte és el lloc principal on anar el proper cop que sigui pel Born. Us deixo amb algunes de les fotos que tenen a la seva pàgina web, per a que us feu una idea del lloc. 


The other place I want to show you is also in Born, in Barcelona. It's "Florentine Cupcakes" When I got there there were closing and I couldn't buy anything or take pictures. However, we could get in and, although they were cleaning up, inside the atmosphere was of glamour, "savoir-faire", and everything in a very chic style. It's definetely the place I will go next time I go to Born. Here I leave you some of the pictures they have in their webpage, so that you get an idea of the place. 


La seva adreça: http://www.florentinecupcakes.com/

Calders 3, El Born, Barcelona


Their address: http://www.florentinecupcakes.com/

Calders 3, El Born, Barcelona


Tuesday, January 10, 2012

Pa de pessic de la Peggy Porschen / Peggy Porschen's Victoria Sponge


Ufff, més d'un mes sense publicar res!!! No us penseu que he deixat de fer cupcakes, pastissos i galetes, la veritat és que n'he fet un munt!!! Simplement ha sigut una temporada en que tot se'm girava en contra per poder publicar res.... En fi, torno a ser aquí amb moltes ganes de compartir les meves receptes amb vosaltres. Aquí us deixo la d'un pa de pessic que vaig fer servir en un pastís per a una amiga que feia anys. El tema decoració i presentació encara l'he de millorar, però el pastís va sortir boníssim!!! Espero poder anar avançant en aquest tema, i més ara que els reis m'han portat llibres de decoració amb sucre :)


Uffff, more than a month without posting anything!!! Don't you think I gave up baking cupcakes, cakes and cookies, the truth is that I've been pretty productive!!! It's simply been a period in which the fate has taken me apart from posting.... Well, I'm back and full of energy for sharing my recipes with you. Here I leave you a Sponge that I used for a friend's cake on her birthday. The decoration and presentation issue is still not very good, but the cake came out sooo delicious!!! I hope to improve in that aspect, considering all the cake decorating books I got during the holidays :) 

PA DE PESSIC “VICTORIA SPONGE” DE LA PEGGY PORSCHEN
Per omplir un motlle de 30x40 cm, o dos motlles rodons de 20cm o uns 50 cupcakes.

400g mantega salada, a temperatura ambient
400g sucre mòlt
8 ous mitjans, a temperatura ambient
400g Farina de pastisseria (o normal més 2 culleretes de llevat químic)
Una mica d’oli vegetal

Sabors opcionals:
Vainilla: afegir les llavors de dues baines de vainilla (o equivalent)
Llimona: afegir la ratlladura de 4 llimones
Taronja: afegir la ratlladura de 4 taronges
Xocolata: reemplaçar 100g de farina amb 100g de xocolata en pols i afegir 100g de xocolata  negra fosa a la barreja de mantega i sucre.

Prescalfar el forn a 200ºC

Posar la mantega, el sucre i el sabor escollit en un bol. Batre amb l’ajut d’un batedor elèctric.
Batre els ous en un altre bol i afegir-los lentament a la barreja anterior a velocitat mitjana. Si la barreja es comenta a tallar, afegiu-hi una mica de farina.
Un cop els ous i la mantega estan ben incorporats, afegir la farina batent a baixa velocitat.
Engreixar el motlle amb oli vegetal per a que no s’enganxi el pa de pessic.  Omplir el motlle amb l’ajut d’una espàtula per a que la massa quedi ben distribuïda. Jo vaig poder omplir tres motlles rodons de 18cm, 15cm i 12cm respectivament.
Fornejar un motlle gran durant 25 minuts aproximadament, i si feu cupcakes amb 12-15 minuts n’hi ha prou. Fer la prova de l'escuradents abans de treure del forn (ha de sortir net al punxar el centre del pa de pessic). Desemmotllar i deixar refredar sobre una reixeta. Embolicar amb film de cuina si no s’ha de fer servir immediatament. Aguanta bé embolicat a la nevera durant una setmana, o es pot congelar.

Per tenir un pa de pessic tendre i ple de sabor, empapar-lo amb xarop de sucre i deixar infusionar d’un dia per  l’altre per a que el sabor agafi més fort. Per fer el xarop de sucre, desfer 250g de sucre i 250ml d’aigua en un pot, remenant bé. Quan arribi al bull, tancar el foc i deixar refredar. Quan s’hagi refredat una mica, afegir el sabor que vulgueu (llavors d’una baina de vainilla, ratlladura de llimona i licor Limoncello, ratlladura de taronja i licor Grand Marnier, licor de menta)

Jo vaig empapar els pastissos amb xarop de vainilla el dia abans. Llavors vaig muntar els pans de pessic l’un a sobre l’altre posant-hi buttercream de vainilla i melmelada de gerds entremig.  El pa de pessic sol ja és boníssim, però amb el xarop i llavors el buttercream i la melmelada encara és molt millor. La part més complicada va ser cobrir els pastissos amb fondant. Bé, ha sigut el meu primer pastís cobert de fondant, segur que m’anirà sortint millor amb la pràctica.

La rosa la vaig aprendre a fer al taller de cupcakes decorats amb flors de l’Alma d’objectivo cupcake perfecto. M’hauria agradat posar més flors, però els convidats arribaven i ja no em quedava més temps (és el que passa quan fas les coses a última hora). Espero que us agradi :)


PEGGY PORSCHEN'S BASIC VICTORIA SPONGE
Makes one 30x40 cm (12x16 inch) baking tray or two 20 cm (8 inch) round baking mould or about 50 cupcakes.

400g salted butter, softened
400g caster sugar
8 medium eggs, at room temperature
400g self-raising flour
A little vegetable oil

Optional flavors:
For vanilla sponge: add seeds from 2 vanilla pods (or equivalent)
For lemon sponge: add finely grated zest of 4 lemons
For orange sponge: add finely grated zest of 4 oranges
For chocolate sponge: replace 100g of self-raising flour with 100g of cocoa powder and add 100g melted dark Belgian chocolate to the butter-and-sugar mix

Preheat the oven to 200ºC
Place the butter, sugar and chosen flavoring in a bowl and cream together with the help of an electric mixer.
Beat the eggs in another bowl and slowly add to the mix, while paddling on medium speed. If the mixture starts curdling, add a little bit of flour.
Once the eggs and the butter mixture are combined, mix in the flour mixture at low speed.
Grease a baking tray or cake mould with a little vegetable oil. Fill evenly with the mixture, using a large palette knife. I could fill three round moulds (18, 15 and 12 cm each)
Bake a large tray or mould for about 25 minutes, and cupcakes for about 12-15 minutes. Test the sponge with a toothpick; it should come out clean when inserted in the middle.
Lift off the mould and allow to cool on a wire rack. Wrap in film to keep for up to a day in a cool dry place. If you need to keep it for longer, then wrap and store in the refrigerator for up to a week, or freeze.

In order to get a sponge that is very moist and full of flavor, soak it with sugar syrup and let infuse overnight, so that the flavor develops more strongly.
To make sugar syrup, place 250g sugar and 250ml water in a saucepan, stir well and bring to the boil. Let it cool down. When lukewarm, add the flavorings (seed from a vanilla pod, or finely grated lemon zest and Limoncello liqueur, or finely grated orange zest and Grand Marnier liqueur, or peppermint liqueur)

I soaked my sponges with vanilla flavored syrup the day before. For layering I used vanilla buttercream and raspberry jam. The sponge itself is super moist and delicious, but when you add the syrup and then the buttercream and jam it becomes even better. It was such a success and super easy to do. The most complicated part was to cover everything with fondant. Well, it was my first fondant covered cake; I guess this part will get better with some practice.  

I learned how to make the rose in a cupcake decorating workshop from Alma of objectivo cupcake perfecto. I would have liked to make more roses, but the guests where coming and I didn't have any more time (this is what happens when you do things last minute). I hope you like it :)

Related Posts Plugin for WordPress, Blogger...