Tuesday, January 24, 2012

Ocellets i Curs / Little Birds and Course


Un ocellet m'ha dit que s'ha obert un curs de galetes i decoració!!!
A little bird has told me that there is a cookie decoration course!!!


Data: Dissabte 25 de febrer  
Date: Saturday 25th February

Hora: de 10 a 14h (amb esmorzar al mig)  
Time: from 10 to 14h (with breakfast in the middle)

Lloc: Obrador / casa de Cupcakes by Silvia (Castellar del Vallès)   
Place: kitchen / home of Cupcakes by Silvia (Castellar del Vallès)

Alumnes: màxim 6 persones  
Students: 6 people maximum

Preu: 40 euros  
Price: 40 euros


Què farem: aprendrem a fer galetes de mantega amb formes bàsiques i aprendrem a decorar-les amb glassa i amb fondant. 
What we will do: learn how to make butter cookies in basic shapes and learn how to decorate with royal icing and with fondant.

Cada alumne s'endurà a casa les seves creacions
Each student will take their creations home

Inscripció: silnik022@yahoo.com  
Application: silnik022@yahoo.com


Sunday, January 15, 2012

Cupcakes a Barcelona / Cupcakes in Barcelona

Què penseu, que només es poden menjar cupcakes a Londres??? NO!!!! A Barcelona també!!!!
Avui us explicaré un parell de llocs molt monos que vaig descobrir al barri del Born. Si hi aneu, segur que també us agradaran tant com a mi.


What do you think, good cupcakes only in London??? NO!!!! In Barcelona too!!!!
Today I will tell you about a couple of cute places that I discovered in the district of the Born. If you happen to go there, I’m sure you’ll like them as much as I did. 


Primer de tot la "Lolita Bakery" on trobareu força varietat de cupcakes, pastissos i galetes. Són de gustos i d'estètica una mica tradicionals, però també hi trobareu propostes originals. El local és d'estil vintage, amb peces antigues i mobiliari amb caràcter nòrdic, molt acollidor i càlid, però amb poc lloc per a seure i gaudir del que surt del seu forn. Com que no havíem berenat quan hi vem arribar, i érem una bona colla, vem triar una selecció de cupcakes i pastissos ben variada i vem sortir a fora a degustar-los. Gairebé tot ho vem trobar molt bo, menys un tros de pastís que estava poc cuit i feia gust de farina crua. Per sort, tot el demès estava deliciós i va compensar el tros que no va sortir bé.


First of all “Lolita Bakery”, where you will find a good variety of cupcakes, cakes and cookies. They are traditional in taste and image, although you’ll also find some more original offers. The place has a vintage look, with old pieces and Nordic-kind furniture. It’s very homely and warm, but with little place to sit and enjoy what they bake. We hadn’t eaten before we got there, and because we were quite a lot of people, we chose a good selection of cupcakes and cakes and took them away. We found almost everything very delicious, except a piece of cake that was under baked and tasted like raw flour. Luckily, everything else was delicious and made up for the bad piece.


Aquesta pissarra amb les instruccions per a fer un cupcake és d'allò més original i artístic. Em va encantar.


This blackboard with the instructions to bake a cupcake is so original and artistic. I loved it.


També venen càpsules per a cupcakes, caixes i complements per als vostres dolços. Tot molt mono.


They also have cupcake capsules, boxes and complements for your sweet treats. Very cute.


Aquí alguna mostra de les seves galetes, a dalt, i dels cupcakes, a baix. Si esteu mirant això abans de dinar o de sopar, de ben segur que se us deu haver obert la gana!! 


Here some of their cookies, above, and cupcakes, below. If you are watching this before having lunch or dinner, sure it will have given you an appetite. 


La seva adreça: 
http://www.lolitabakery.com/


Portal Nou 20
El Born, Barcelona


També els trobareu a Provenca 267, Eixample, Barcelona


Their address: 
http://www.lolitabakery.com/


Portal Nou 20
El Born, Barcelona


You'll also find them in Provenca 267, Eixample, Barcelona


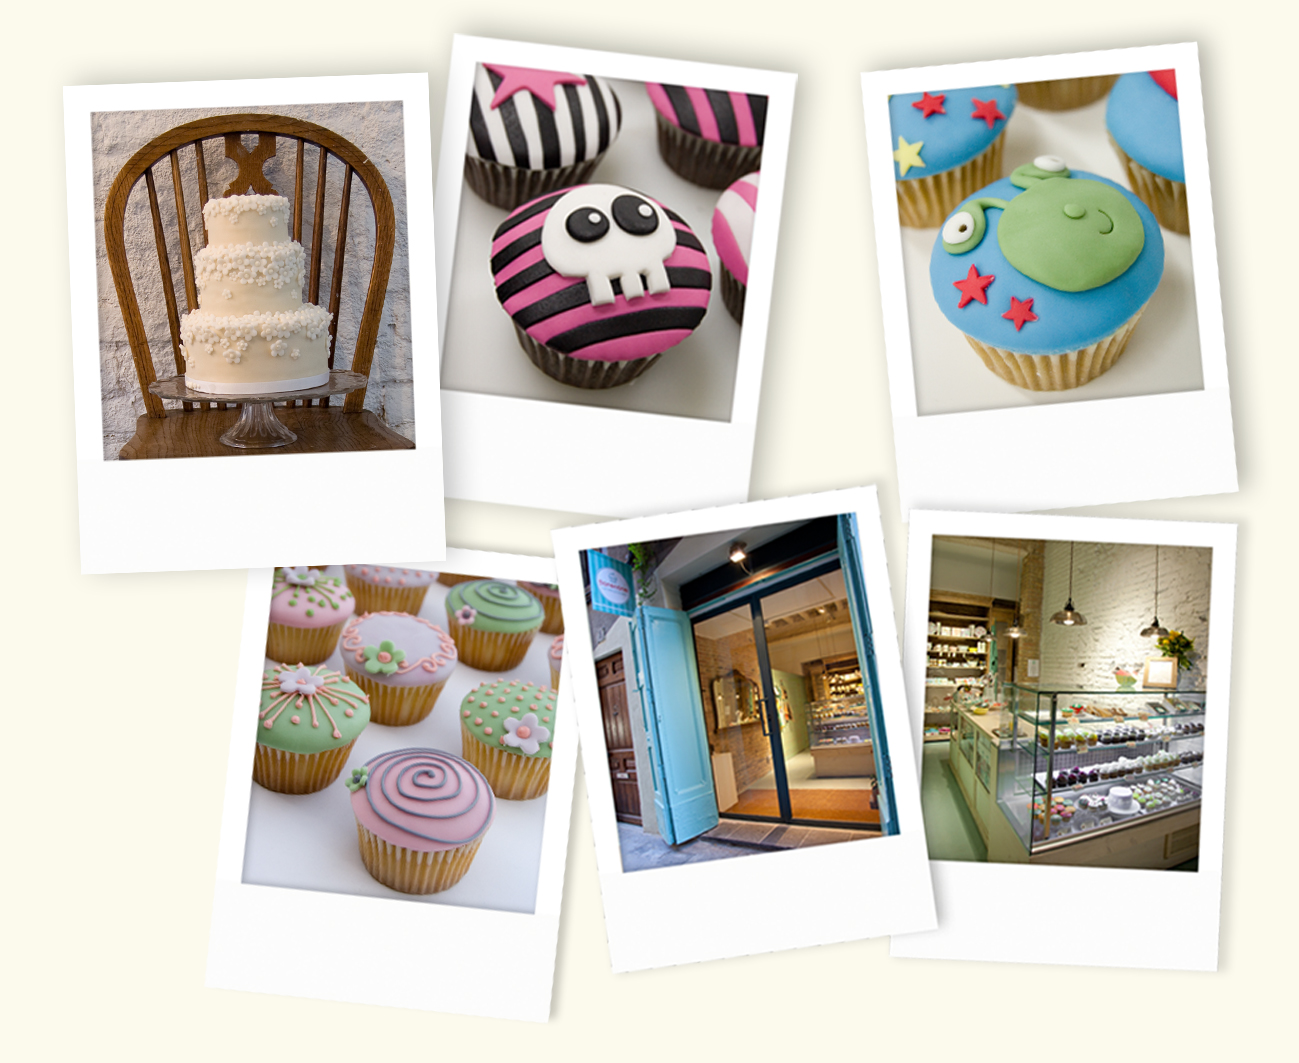
L'altre lloc que us vull ensenyar també es troba al Born. Es tracta de "Florentine Cupcakes". Quan hi vem arribar ja eren a punt de tancar i no vaig poder comprar res ni fer-hi fotos. Tot i així, ens van deixar entrar-hi i tot i que ja recollien, allí dins es respirava glamour i "savoir-faire", dins d'un estil molt chic. Sens dubte és el lloc principal on anar el proper cop que sigui pel Born. Us deixo amb algunes de les fotos que tenen a la seva pàgina web, per a que us feu una idea del lloc. 


The other place I want to show you is also in Born, in Barcelona. It's "Florentine Cupcakes" When I got there there were closing and I couldn't buy anything or take pictures. However, we could get in and, although they were cleaning up, inside the atmosphere was of glamour, "savoir-faire", and everything in a very chic style. It's definetely the place I will go next time I go to Born. Here I leave you some of the pictures they have in their webpage, so that you get an idea of the place. 


La seva adreça: http://www.florentinecupcakes.com/

Calders 3, El Born, Barcelona


Their address: http://www.florentinecupcakes.com/

Calders 3, El Born, Barcelona


Tuesday, January 10, 2012

Pa de pessic de la Peggy Porschen / Peggy Porschen's Victoria Sponge


Ufff, més d'un mes sense publicar res!!! No us penseu que he deixat de fer cupcakes, pastissos i galetes, la veritat és que n'he fet un munt!!! Simplement ha sigut una temporada en que tot se'm girava en contra per poder publicar res.... En fi, torno a ser aquí amb moltes ganes de compartir les meves receptes amb vosaltres. Aquí us deixo la d'un pa de pessic que vaig fer servir en un pastís per a una amiga que feia anys. El tema decoració i presentació encara l'he de millorar, però el pastís va sortir boníssim!!! Espero poder anar avançant en aquest tema, i més ara que els reis m'han portat llibres de decoració amb sucre :)


Uffff, more than a month without posting anything!!! Don't you think I gave up baking cupcakes, cakes and cookies, the truth is that I've been pretty productive!!! It's simply been a period in which the fate has taken me apart from posting.... Well, I'm back and full of energy for sharing my recipes with you. Here I leave you a Sponge that I used for a friend's cake on her birthday. The decoration and presentation issue is still not very good, but the cake came out sooo delicious!!! I hope to improve in that aspect, considering all the cake decorating books I got during the holidays :) 


PA DE PESSIC “VICTORIA SPONGE” DE LA PEGGY PORSCHEN
Per omplir un motlle de 30x40 cm, o dos motlles rodons de 20cm o uns 50 cupcakes.

400g mantega salada, a temperatura ambient
400g sucre mòlt
8 ous mitjans, a temperatura ambient
400g Farina de pastisseria (o normal més 2 culleretes de llevat químic)
Una mica d’oli vegetal

Sabors opcionals:
Vainilla: afegir les llavors de dues baines de vainilla (o equivalent)
Llimona: afegir la ratlladura de 4 llimones
Taronja: afegir la ratlladura de 4 taronges
Xocolata: reemplaçar 100g de farina amb 100g de xocolata en pols i afegir 100g de xocolata  negra fosa a la barreja de mantega i sucre.

Prescalfar el forn a 200ºC

Posar la mantega, el sucre i el sabor escollit en un bol. Batre amb l’ajut d’un batedor elèctric.
Batre els ous en un altre bol i afegir-los lentament a la barreja anterior a velocitat mitjana. Si la barreja es comenta a tallar, afegiu-hi una mica de farina.
Un cop els ous i la mantega estan ben incorporats, afegir la farina batent a baixa velocitat.
Engreixar el motlle amb oli vegetal per a que no s’enganxi el pa de pessic.  Omplir el motlle amb l’ajut d’una espàtula per a que la massa quedi ben distribuïda. Jo vaig poder omplir tres motlles rodons de 18cm, 15cm i 12cm respectivament.
Fornejar un motlle gran durant 25 minuts aproximadament, i si feu cupcakes amb 12-15 minuts n’hi ha prou. Fer la prova de l'escuradents abans de treure del forn (ha de sortir net al punxar el centre del pa de pessic). Desemmotllar i deixar refredar sobre una reixeta. Embolicar amb film de cuina si no s’ha de fer servir immediatament. Aguanta bé embolicat a la nevera durant una setmana, o es pot congelar.

Per tenir un pa de pessic tendre i ple de sabor, empapar-lo amb xarop de sucre i deixar infusionar d’un dia per  l’altre per a que el sabor agafi més fort. Per fer el xarop de sucre, desfer 250g de sucre i 250ml d’aigua en un pot, remenant bé. Quan arribi al bull, tancar el foc i deixar refredar. Quan s’hagi refredat una mica, afegir el sabor que vulgueu (llavors d’una baina de vainilla, ratlladura de llimona i licor Limoncello, ratlladura de taronja i licor Grand Marnier, licor de menta)

Jo vaig empapar els pastissos amb xarop de vainilla el dia abans. Llavors vaig muntar els pans de pessic l’un a sobre l’altre posant-hi buttercream de vainilla i melmelada de gerds entremig.  El pa de pessic sol ja és boníssim, però amb el xarop i llavors el buttercream i la melmelada encara és molt millor. La part més complicada va ser cobrir els pastissos amb fondant. Bé, ha sigut el meu primer pastís cobert de fondant, segur que m’anirà sortint millor amb la pràctica.

La rosa la vaig aprendre a fer al taller de cupcakes decorats amb flors de l’Alma d’objectivo cupcake perfecto. M’hauria agradat posar més flors, però els convidats arribaven i ja no em quedava més temps (és el que passa quan fas les coses a última hora). Espero que us agradi :)


PEGGY PORSCHEN'S BASIC VICTORIA SPONGE
Makes one 30x40 cm (12x16 inch) baking tray or two 20 cm (8 inch) round baking mould or about 50 cupcakes.

400g salted butter, softened
400g caster sugar
8 medium eggs, at room temperature
400g self-raising flour
A little vegetable oil

Optional flavors:
For vanilla sponge: add seeds from 2 vanilla pods (or equivalent)
For lemon sponge: add finely grated zest of 4 lemons
For orange sponge: add finely grated zest of 4 oranges
For chocolate sponge: replace 100g of self-raising flour with 100g of cocoa powder and add 100g melted dark Belgian chocolate to the butter-and-sugar mix

Preheat the oven to 200ºC
Place the butter, sugar and chosen flavoring in a bowl and cream together with the help of an electric mixer.
Beat the eggs in another bowl and slowly add to the mix, while paddling on medium speed. If the mixture starts curdling, add a little bit of flour.
Once the eggs and the butter mixture are combined, mix in the flour mixture at low speed.
Grease a baking tray or cake mould with a little vegetable oil. Fill evenly with the mixture, using a large palette knife. I could fill three round moulds (18, 15 and 12 cm each)
Bake a large tray or mould for about 25 minutes, and cupcakes for about 12-15 minutes. Test the sponge with a toothpick; it should come out clean when inserted in the middle.
Lift off the mould and allow to cool on a wire rack. Wrap in film to keep for up to a day in a cool dry place. If you need to keep it for longer, then wrap and store in the refrigerator for up to a week, or freeze.

In order to get a sponge that is very moist and full of flavor, soak it with sugar syrup and let infuse overnight, so that the flavor develops more strongly.
To make sugar syrup, place 250g sugar and 250ml water in a saucepan, stir well and bring to the boil. Let it cool down. When lukewarm, add the flavorings (seed from a vanilla pod, or finely grated lemon zest and Limoncello liqueur, or finely grated orange zest and Grand Marnier liqueur, or peppermint liqueur)

I soaked my sponges with vanilla flavored syrup the day before. For layering I used vanilla buttercream and raspberry jam. The sponge itself is super moist and delicious, but when you add the syrup and then the buttercream and jam it becomes even better. It was such a success and super easy to do. The most complicated part was to cover everything with fondant. Well, it was my first fondant covered cake; I guess this part will get better with some practice.  

I learned how to make the rose in a cupcake decorating workshop from Alma of objectivo cupcake perfecto. I would have liked to make more roses, but the guests where coming and I didn't have any more time (this is what happens when you do things last minute). I hope you like it :)

Friday, December 2, 2011

més i més galetes!!!! Tallers :) / cookies and more cookies!!!! Workshops :)

En aquestes darreres setmanes la meva vida s'ha omplert de galetes i més galetes!!!! En els tres tallers que he fet: dos a l'escola i un amb les cooperatives de consum de Castellar a Cal Gorina, he ensenyat a més de 60 persones a fer i a decorar galetes, i he fet més de 300 galetes en dues setmanes. Uff, vist així sembla espaterrant, oi? La veritat és que ha sigut molt divertit i tots ens ho hem passat molt bé. A més, s'han pogut descobrir vertaders artistes decorant galetes :) 


In these last weeks my life has been filled with cookies and more cookies!!!! In the three workshops I've conducted: two at the school and one in Cal Gorina in Castellar, I've taught more than 60 people to make and decorate cookies, and I've made more than 300 cookies in two weeks. Wow, seen like this it seems overwhelming, doesn't it? The truth is that it's been so much fun and we've all had a very good time. Besides, we've been able to discover true artists in decorating cookies :) 


Alguns dels meus alumnes galeters
Some of my cookie students

La recepta en paper que vaig preparar per als tallers està més ben explicada que la que tinc penjada al blog anteriorment, així que en al final d'aquesta entrada us deixo la recepta de les galetes de mantega un altre cop.

The recipe that I prepared in paper for the workshops is better explained than the one I posted in the blog previously, so at the end of this post I will write the recipe for the butter cookies again.

Fent la massa de les galetes
Making the cookie batter

I estirant-la amb el corró. 
Està dura la massa després de tenir-la a la nevera, eh?
And rolling it out with a rolling pin.
It's hard when the dough is cold from the refrigerator, isn't it?


Galetes directes al forn!!!
Cookies directly to the oven!!!

Un cop fetes i fredes estan llestes per a decorar :)
Once baked and cold, they are ready to decorate :)

Primer resseguim el contorn amb glassa més espesa, 
i després omplim amb glassa més líquida
First we make the outline with thick icing,
and then we fill it with running icing

Les galetes comencen a quedar xules, eh?
The cookies are getting nice, aren't they?

I ens ho passem genial
And we have great fun

Algunes galetes ja acabades
Some finished cookies

Els petits també ho van voler provar, hehe :)
The little ones also wanted to try :)

Les galetes fetes en aquest primer taller a l'escola es vendran properament en benefici del projecte de cooperació que l'escola El Casal té a Gàmbia. Animeu-vos a comprar-ne!!! S'accepten encàrrecs a l'adreça de correu que hi ha en aquest blog. 

The cookies made in this first workshop at the school will be sold in short. The benefits will be for the cooperation project the school El Casal has in Gambia. Don't hesitate to collaborate!!! I accept orders at the email address you can find in this blog.

I aquí us deixo la recepta de galetes que us he promès:

And here the cookie recipe I've promised:


Ingredients:

200 g mantega sense sal, a temperatura ambient
200 g sucre (mòlt)
1 ou batut
400 g Farina (i una mica més per estirar la massa)


Sabors opcionals:

Vanilla cookies: afegir extracte de vainilla o sucre de vainilla.
Lemon cookies: afegir la ratlladura d’una llimona
Orange cookies: afegir la ratlladura d’una taronja
Chocolate cookies: reemplaçar 50 g de Farina per 50 g de cacau en pols

Materials:

Batedor elèctric (o manual si sou valents)
Film de cuina
Guies
Corró
Talladors de galeta
Espàtula plana o ganivet
Paper de forn
Safata pel forn


Elaboració:

Batre la mantega a velocitat mitjana fins que aquesta es torni de color blanc. Afegir el sucre i l’aroma desitjat fins obtenir una crema homogènia. Incorporar l’ou batut (si volem fer galetes de colors, en aquest moment incorporar també el colorant). Afegir la Farina a velocitat baixa en tres vegades fins aconseguir una massa ferma.
Embolicar la massa en film de cuina i deixar refredar a la nevera com a mínim una hora.

Preescalfar el forn a 180ºC

Estirar la massa sobre una superfície enfarinada (sinó, la massa s’enganxarà, també es pot fer sobre paper de forn) amb l’ajut d’un corró. Per determinar el gruix de les galetes podem fer servir unes guies o dues fustes de tallar que es col·locaran en els extrem, descansant el corró sobre aquestes fustes.

Tallar les formes de les galetes amb talladors de galeta i retirar la massa que sobra. Posar-les sobre en una safata sobre paper de forn, amb una distància d’uns 3 o 4 centímetres, ja que al forn creixen una mica.

Fornejar durant 12 minuts aproximadament. Han de quedar blanquetes però més torrades pels costats. Al treure-les del forn dóna la sensació que estan crues, però al deixar refredar s’endureixen i estan perfectes.

Un cop Fredes, decorar amb glassa o amb fondant.


Decoració:


Es poden decorar les galetes amb glassa de sucre.

Ingredients:
250g sucre glass
4 cullerades clara d’ou pasteuritzada
10 gotes de llimona

Es combinen tots els ingredients a la batedora i es bat a velocitat alta durant 5 minuts. Un cop feta la glassa, es poden afegir unes culleradetes d’aigua fins obtenir la fluïdesa desitjada. El color de la glassa és blanc, però podem afegir colorant alimentari per obtenir el color que vulguem.

També es poden decorar les galetes amb fondant (comprat en tendes especialitzades). S’estira amb un corró, es talla amb la forma desitjada, i s’enganxa damunt la galeta amb pega comestible, nutella o similar.


Ingredients

200 g unsalted butter, at room temperature
200 g caster sugar
1 egg
400 g flour

Optional flavors:

Vanilla cookies: add vanilla extract
Lemon cookies: add grated lemon zest
Orange cookies: add grated orange zest
Chocolate cookies: replace 50 g of the flour with 50 g of cocoa powder.

Preparation:

In a bowl, cream the butter with the aid of an electric mixer, until obtaining a creamy and white mixture. Add the sugar and the chosen flavoring until obtaining a uniform cream. Mix in the beaten egg (if we want to make color cookies, we can add food color now). Add the flour using the mixer at low speed in three addition, until making a dough.
Make a ball with this dough and wrap it in film. Let it cool in the refrigerator for at least 1 hour.

Preheat the oven at 180ºC

Place the dough on a floured surface and roll it out using a rolling pin until having a two ½ inch (5 mm) thickness. To achieve an even thickness we can use guides on the rolling pin, or we can use two cutting boards as guides: the boards on the sides, the dough in the middle, and the rolling pin lying on these boards.

Use a cookie cutter to cut out the shapes of your choice. Lay the cookies on a baking tray lined with greaseproof paper, and leave a distance of 3-4 cm between them because they tend to grow a little in the oven.

Bake for 12 minutes approximately, or until white in the middle and a bit golden at the edges. When they come out of the oven it seems that they are not done enough, but when they cool they get harder and they are perfect.

Once the cookies are cold, they can be decorated with icing, or with fondant.

Decoration


Cookies can be decorated with sugar icing.

Ingredients:
250g icing sugar
4 tablespoons pasteurized egg whites
10 lemon drops

Combine all the ingredients in a bowl and beat at high speed for 5 minutes. Once the icing is made, you a little bit of water may be added until obtaining the desired consistency. The icing colour is White, but you can add food colour to have any colour wanted.

Cookies can also be decorated with fondant (bought at specialized shops). Roll it out with the help of a rolling pin, cut it in the desired shape, and place it on top of the cookie using edible glue, nutella, or similar. 


Sunday, November 27, 2011

De compres / Shopping

Després de tota la bogeria per les galetes que he desfermat amb els tallers de decoració de galetes fets a l'escola i a cal Gorina, a Castellar del Vallès, i ja que molts m'heu preguntat on es poden comprar els colorants, el fondant i els talladors de galeta, us deixo aquí uns quants links de botigues on-line especialitzades on podreu comprar coses xules :) 
És fantàstic que hi hagi tanta gent a qui li hagi agradat això de fer galetes!!!! La veritat és que jo també m'ho passo molt bé fent-les i ensenyant a fer-les ;) Els propers tallers seran de cupcakes, ho prometo.


After the craziness for the cookies that I have created with my cookie decoration workshops at the school and in cal Gorina, in Castellar del Vallès, and since many people have asked me for places to buy food color, fondant and cookie cutters, here I post some specialized online shops where you can get very nice stuff.
It's awesome that so many people have liked cookie making and decorating!!!! The truth is that I also enjoy making them, and teaching too ;) Next workshops will be about cupcakes, I promise. 


For the Cakes     http://forthecakes.com/shop/es/


Aquesta botiga és moníssima i té un munt de coses per fer i decorar pastissos, galetes, cupcakes i més. Les comandes superiors a 55 euros tenen enviaments gratuïts a la península i balears, i des d'aquest mes tenen botiga física a Barcelona. Jo encara no m'hi he passat, però està a la meva llista, així que aviat em veureu per allí :)


This shop is so cute. They've got plenty of things for making and decorating cakes, cookies, cupcakes and more. For orders of more than 55 euro, the shipping is for free in the Spanish peninsula and the Balearic Islands, and since this month they have a physical shop in Barcelona. I haven't been there yet, but it's in my list, so you'll soon see me there :)

For the Cakes

Carrer Canonge Pibernat, 14

08028 Barcelona

rodolfo@forthecakes.com

Tel. 935150918

METRO BADAL (L5)


Aquesta botiga també té lloc físic a Barcelona. Tot i que per a que l'enviament sigui gratuït s'han de fer comandes superiors a 200 euros, el preu d'enviament que tenen és molt competitiu. Tenen un munt de productes nous per a Nadal, tant per a pastissos, galetes, cupcakes, bombons.... i bons preus.

This shop also has a physical place in Barcelona. Although you need to order more than 200 euro to have free shipping, the shipping cost they have is very low. They've got lots of new stuff for making and decorating Christmas cakes, cookies, cupcakes, chocolates... and good prices. 


El mundo de la reposteria

Avda Borbó 35

08031 Barcelona 

Tel. 932 852 931


Aquesta botiga és de Madrid i els enviaments són carets, però tenen tantes coses i tan mones que val la pena, sobretot per la gran quantitat de talladors de galetes que tenen!!! El fondant amb sabor de vainilla de "funcakes" que tenen és molt bo, millor que d'altres que he probat. No tenen tenda física, però el seu contacte és:


This shop is from Madrid and shipping costs are high, but they've got such cute and varied stuff that it's worth it, specially for their great variety of cookie cutters!!! The vanilla flavoured fondant they have from "funcakes" is delicious, much better than others I've had. They don't have a physical shop, but their contact is:  


latartienda@latartienda.com  

Tel. 619258576 

Altres botigues online que de moment no coneixo, ja que no hi he comprat, però que igualment val la pena visitar són:


These are other online shops that I don't know yet because I haven't bought anything from them yet, but are also worth visiting:


 COMERCIAL MINGUEZ


Hi ha més botigues, però crec que de moment amb això ja feu per començar, no?


There are more shops, but I think that it's good enough to get started, isnt't it?


Monday, November 14, 2011

Galetes decorades de Nadal / Decorated Christmas cookies

Nadal comença a acostar-se!!!! Us deixo unes quantes fotos de galetes de Nadal decorades per a que aneu obrint boca. Aviat publicaré més dissenys!!!

Christmas is almost here!!!! I'm posting some decorated Christmas cookie pictures to start getting into the Christmas mood. I will soon publish more designs!!!


Totes les galetes porten un forat per passar-hi un cordó i fer-les servir com a decoració de Nadal.

All the cookies have got a little hole to use the cookies as Christmas decorations.


Encara que si vull decorar casa meva amb galetes, n'hauré de fer més perquè els meus nens són terribles i no n'han deixat cap de sencera!!!

Although, if I want to decorate the house with Christmas cookies, I will have to bake some more because my children are so terrible that ate them all!!


Amb aquest trineu Santa Claus podrà arribar ben ràpidament a casa dels nens que li hagin escrit una carta :)

With this sleigh Santa Claus will be able to arrive very quickly to all the children's houses :)


 Però com que el Pare Noel no para mai a casa nostra, ens haurem de conformar amb aquests dolços i esperar a que al reis mags vulguin fer-nos una visita.

But, as Santa never stops at our place, we will have to wait for the Three Wise Men to come and visit us. Meanwhile, we'll eat some of these sweet treats.


Totes les galetes així juntetes fan goig, oi? La recepta, aquí

All these cookies together look nice, don't they? The recipe, here

Thursday, November 3, 2011

Halloween Goodies and Pumpkin Pie


A més de les castanyes i els panellets, per cert, boníssims preparats per la meva mare i la meva filla que són unes súper artistes, aquest any hem tingut una gran varietat de postres de halloween: cupcakes i mini cupcakes de carabassa amb frosting de carabassa i unes carabassetes de fondant com a topping, pastís de carabassa deliciós i decorat amb una teranyina de xocolata, i galetes de halloween més simpàtiques que terrorífiques que van ser les delícies dels més menuts i també dels grans. Qui vol menjar res més amb tot això? Jo hauria fet una castanyada exclusiva de dolços!!! 


A part from the baked chestnuts and “panellets”, very good by the way prepared by my mom and my daughter who are really artists, this year we’ve had plenty of Halloween desserts: pumpkin cupcakes and mini cupcakes with pumpkin frosting and little fondant pumpkin toppers, delicious pumpkin pie decorated with a chocolate spider web, and more friendly than scary Halloween decorated cookies which both children and adults found terrific. Who wants to eat anything else with all these goodies? I would have celebrated Halloween only with sweet stuff!!! 


Per a la recepta dels cupcakes de carabassa, podeu anar aquí
Per a la recepta de les galetes, podeu anar aquí


For the recipe of the pumpkin cupcakes, go here
For the recipe of the cookies, go here


I ara us deixo la recepta del pastís de carabassa, que no només és típic per Halloween, sinó que a més són les postres per excel·lència als Estats Units per Thanksgiving. La recepta és de la Hummingbird bakery, i encara que a mi no em queda amb una crosta per sobre com es veu a la fotografia del llibre, és molt bo igualment. Si a vosaltres us queda amb crosta per sobre, m'expliqueu el vostre secret, eh?


And now I leave the recipe of the pumpkin pie, which is not only typical for Halloween, but is also the classic Thanksgiving pie in the United States. The recipe comes from the Hummingbird bakery, and although when I bake it doesn’t come out with a fine crust on top as seen on the picture from the book, it’s still delicious. If you do get this crust, tell me your secret!!!


Ingredients per a la base (per a un motlle de 23cm de diàmetre)


260 g farina
1/2 teaspoon sal
110 g mantega


Posem la farina, la sal i la mantega en un bol i ho barregem amb l'ajut d'un batedor elèctric fins obtenir una consistència com de sorra. Hi afegim una cullerada d'aigua i ho barregem fins obtenir una massa homogènia. Hi afegim una segona cullerada d'aigua i ho tornem a barrejar. Si la massa és encara massa seca, s'hi pot afegir més aigua, però anant en compte de no afegir-n'hi massa. Emboliquem la massa amb film de cuina i la deixem reposar durant una hora.


Ingredients per al pastís de carabassa


1 ou gran
425 g puré de carabassa (aquí explico còm fer el puré)
235 llet evaporada (llet ideal)
220 sucre mòlt
1 teaspoon sal
1 teaspoon canyella molta
1/4 teaspoon gingebre mòlt
1 tablespoon farina


Preescalfar el forn a 170ºC
Enfarinem la zona de treball per estirar la massa base del pastís amb un corró. La col·loquem cobrint tot el fons del motlle i també els laterals.
En un bol, barregem l'ou, el puré de carabassa, la llet evaporada, el sucre, la sal, la canyella, el gingebre i la farina amb l'ajut d'una cullera de fusta, fins que quedi tot ben combinat i no quedin grumolls. 
Aboquem aquesta barreja sobre la massa base que tenim al motlle i ho fornegem tot durant 30-40 minuts, o fins que el farcit quedi ferm i no es bellugui quan sacsegem el pastís. 
Deixem refredar completament, és bo servit fred de la nevera fins i tot. Es pot acompanyar amb una mica de nata, tot i que és tan bo que ni cal. 


Basic Pie Crust Ingredients (for a 23-cm pie dish)

260 g flour
½ teaspoon salt
110 g unsalted butter

Put the flour, salt and butter in a bowl and beat on low speed with an electric mixer until you get a sandy consistency and everything is combined. Add one tablespoon water and beat until well mixed. Add a second tablespoon of water and beat until you have a smooth, even dough. If the dough is still a little dry, add a bit more water, but be careful not to add too much water.
Wrap the dough in cling film and leave to rest for one hour.

Pumpkin Pie Ingredients

1 large egg
425 g pumpkin purée (I explain how to make the purée here)
235 evaporated milk
220 g caster sugar
1 teaspoon salt
1 teaspoon ground cinnamon
1/4 teaspoon ground ginger
1 tablespoon flour

Preheat the oven to 170ºC
Lightly dust a clean work surface with flour and roll out the pie crust dough with a rolling pin. Line the prepared pie dish with the dough and trim the edges with a sharp knife.
Put the egg, purée, evaporated milk, sugar, salt, cinnamon, ginger and flour in a bowl and mix with a wooden spoon until everything is well combined and there are no lumps.
Pour into the pie crust and bake for about 30-40 minutes, or until the filling is set firm and doesn’t wobble when shaken.
Leave to cool completely, it’s even better served cold from the refrigerator. It combines well with a dollop of whipped cream, but it’s also delicious without it.


Saturday, October 29, 2011

Lemon Cupcakes


La Castanyada i Halloween ja són aquí!!!! A casa ens passarem aquests dies de festa fent galetes, pastissos i cupcakes, molts cupcakes, visca :) Bé, també pintant l’habitació dels nens i deixant-la ben mona. Potser ens queda temps per anar al cinema també?

La recepta que us deixo avui no és terrorífica ni a base de castanyes i moniatos, és molt fresca i saborosa. Aquests cupcakes s’han convertit en els preferits del Miquel, és que és molt àcid, ell. 

“Castanyada” (a Catalan holiday) and Halloween are here!!!! At home we’ll spend these holidays baking cookies, cakes and cupcakes, a lot of cupcakes :) Well, also painting the children’s bedroom and making it very cute. Maybe we’ll also have some time to goo to the movies? The recipe I post today is not terrifying or Halloween based, it’s very fresh and tasty in fact. These cupcakes have become Miquel’s favorite, he loves sour!


La recepta és de la Hummingbird Bakery, de Londres, però he doblat les mides per a que surtin més cupcakes (és que de la recepta original no surten més de 10 cupcakes, i què fem només amb 10 cupcakes??? Són tan bons que tothom els voldrà tastar!!!!)
El frosting de llimona és amb formatge philadelphia i mantega, i amb menys sucre que el que posarien els britànics, és que la recepta original ve amb buttercream de llimona i a casa no en són molt fans. Però vosaltres hi podeu posar buttercream i més sucre si us agrada un frosting ben dolç.


The recipe is from the Hummingbird Bakery, in London, but I have doubled the ingredients to have more cupcakes (in the original recipe you don’t get more than 10 cupcakes, and what can you do only with 10 cupcakes??? They are so good that everybody will want to taste hem!!!!) The lemon frosting is with cream cheese and a bit of butter, and with less sugar that the British would use. The original recipe comes with lemon buttercream and we are not fans of it at home. But you can of course use buttercream and more sugar if you like a very sweet frosting.


Ingredients:

240 g Farina
300 g sucre
3 teaspoons llevat químic (royal)
4 tablespoons ratlladura de llimona (i extra per decorar, si voleu)
80 g mantega, a temperatura ambient
240 ml llet
2 ous gran

Frosting de llimona:

150 g sucre glass
40 g mantega, a temperatura ambient
150 g formatge en crema (philadelphia)
2 tablespoons ratlladura de llimona
25 ml llet


Preescalfar el forn a 170ºC

Bateu la mantega amb l’ajut d’un batedor elèctric, o kitchen aid si teniu la sort de tenir-ne. Afegiu-hi el sucre, i quan tingueu una crema ben maca, afegiu els ous, d’un en un, i la ratlladura de llimona. Només amb l’olor que fa la massa al posar-hi la llimona, ja començareu a gaudir d'aquests cupcakes!!
En un bol, poseu-hi la Farina i el llevat i barregeu. Afegiu la Farina i la llet a la massa de mantega, en tres vegades, començant i acabant per la Farina, fins que estigui tot ben incorporat i tingueu una massa homogènia.
Poseu la massa a les càpsules o motlles de cupcake, fins a 2/3 de la seva capacitat. Fornegeu durant 20-25 minuts, fins que a l’inserir un escuradents al mig, aquest surti net.
Deixeu refredar els cupcakes abans de posar-hi el frosting damunt.
Per al frosting de llimona : Bateu tots els ingredients, menys la llet, a velocitat mitjana fins que estigui tot ben incorporat i barrejat. Finalment, tireu-hi la llet, barrejant a velocitat baixa, i quan estigui ben incorporada, poseu el batedor a velocitat alta. Continueu batent fins obtenir una crema ben airejada i suau, durant uns 5 minuts. Com més estona bateu, més airejada sortirà la crema.
Quan els cupcakes siguin freds, poseu-hi el frosting de llimona damunt i decoreu amb una mica de ratlladura de llimona (opcional)
La propera vegada els faré amb lemon curd, que encara no l'he provat en els cupcakes, i em temo que pot valer la pena. La Lorena n'ha publicat una recepta al seu blog, així que us animo a que la visiteu.

Ingredients:

240 g flour
300 g sugar
3 teaspoons baking powder
4 tablespoons grated lemon zest (plus extra to decorate, if you want)
80 g butter, at room temperature
240 ml milk
2 large eggs

Lemon Frosting:

150 g confectioners’ sugar
40 g butter, at room temperature
150 g cream cheese
2 tablespoons grated lemon zest
25 ml milk


Preheat the oven to 170ºC

Beat the butter with the help of an electric mixer, or kitchen aid if you are lucky to have one. Add the sugar, and when you get a nice cream, add the eggs, one at a time, and the grated lemon zest. Only smelling this cream with the lemon, you’ll already start enjoying the cupcakes!!
In a bowl, put the flour and baking powder and mix. Add the flour mixture and the milk to the butter mixture, in three additions, beginning and ending with the flour, until everything is well incorporated and smooth.
Spoon the mixture into the cupcake capsules or molds until two-thirds full, and bake for 20-25 minutes, or until a toothpick inserted in the middle comes out clean.
Let the cupcakes cool before putting the frosting.
For the lemon frosting:  Beat together all the ingredients but the milk on medium speed until the mixture comes together and is well mixed. Slowly pour the milk and beat on low speed, then when it is all incorporated, turn the mixer up to high speed. Continue beating until the frosting is light and fluffy, at least 5 minutes. The longer the frosting is beaten, the fluffier and lighter it becomes.
When the cupcakes are cold, put the lemon frosting on top and decorate with a little lemon zest (optional) Next time I will put lemon curd in the cupcakes, I've never made them like this, and I bet it's worth giving it a try. Lorena has posted a recipe for lemon curd in her blog, so I encourage you to visit it. 


Related Posts Plugin for WordPress, Blogger...